|
<< Click to Display Table of Contents >> Component Interactions |
  
|
|
<< Click to Display Table of Contents >> Component Interactions |
|
What Are Component Interactions?
Component Interactions are how components communicate with each other on the same dashboard or send the communication to a Hyperlink component. The main purpose of interactions are to provide an easy way to refresh the dashboard's data with just a single click.
Which Components Can Have Interactions?
All the components allow for interactions except the Image component. The interactions could be one-to-one, one-to-many, many-to-one or many-to-many. There is no limit on how the components can interact with each other.
Types of Interactions
There are two types of interactions - Data Point interaction and Meta Data interaction. Data Point interaction happens when a data point on a chart, table, or map is clicked; this will send out the point's value(s) to other components for filtering purposes. Meta Data interactions happen when a MeasureBox is clicked. This could send out different meta data from the component like reports, grouping selections, measure values, lists...etc to other components for component refresh.
Meta Data Sender
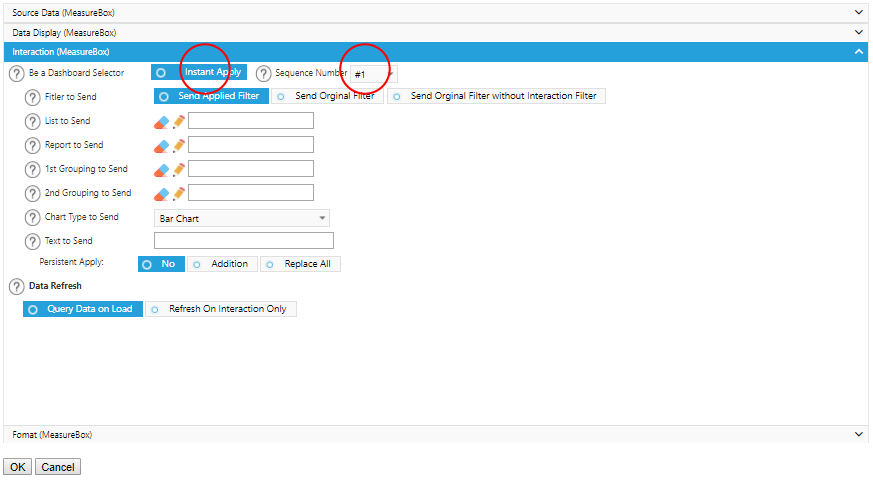
Only the Measure Box component can become a Meta Data sender. To set up a MeasureBox as a sender, select the Interactions tab in the MesaureBox's options. Then click on the Instant Apply button and select a representing sequence number for this interaction.
Data Point Sender
Most of the components could be set up as a Data Point Sender. To set up a component as a sender, select the Interaction tab in the component options. Select the value titled "Yes" on the Dashboard Selector and then click on the Instant Apply button. Some components have 2 grouping values which means that they can send out 2 values at the same time - one from each grouping. Then, select an interaction number to represent this interaction. To apply this interaction following other interactions after this one, please select the Persistent Apply option. This could make an addition which means that it is adding this interaction to the existing list of interactions, or it could be to Replace All which would replace any existing interactions on the list with this one.

Meta Data Receiver
Most of the components could be set up as a Meta Data Receiver. To set up a component as a receiver, select the Interaction tab in the component's options. Click on the MeasureBox under the Interact With Section. Then, select the Interaction number to interact with only a specific component(s). After that, select an action to perform when the interaction happens.

Data Point Receiver
A Data Point Receiver can be set up as a part of the component filter. To do this, go to the filter setup page on the receiving component (please refer to the individual component’s user guide for instructions on how to set up the filter). When creating a filter, instead of selecting values, select from the Interaction dropdown list to select the interaction number.
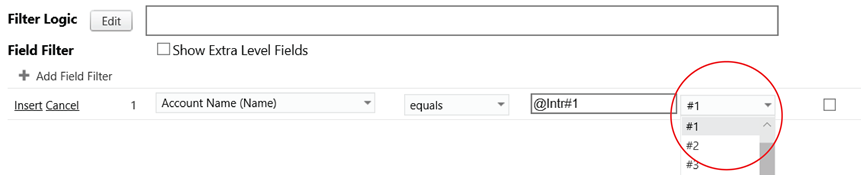
After the selection is made from the dropdown list, an interaction number will be added to the textbox automatically.

Interaction In Action
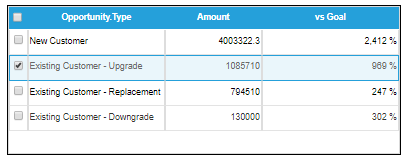
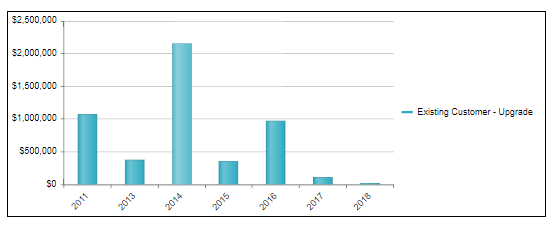
Before any selections happen on the Table component, the Chart component shows all customer types.
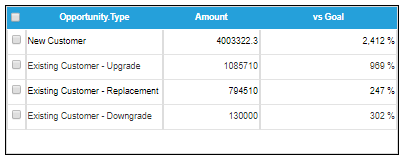
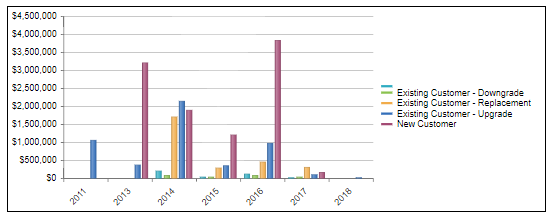
After the New Customer row is selected on the Table component, the Chart component refreshes to only show New Customers.